Your intro message is the message already filled in when you respond to a lead, and quick messages are saved replies you can drop into a response or a conversation. Both are in Inbox settings. If you're looking for quote defaults, the old Quote defaults link now opens Intro Message. If you use Toolbox, you can also edit your intro message in Toolbox settings under Quote, alongside Quote validity and Quote terms.
Open Inbox settings
Go to your Inbox
Log in to your account and open Inbox.
Open the menu at the top of the Inbox
Click on the ••• button at the top of your Inbox, next to the search and filter buttons.
Select Inbox settings
Select Inbox settings. On a computer it opens on Quick Messages, with Intro Message and Quick Messages in the list on the left. On a phone, tap the one you want.
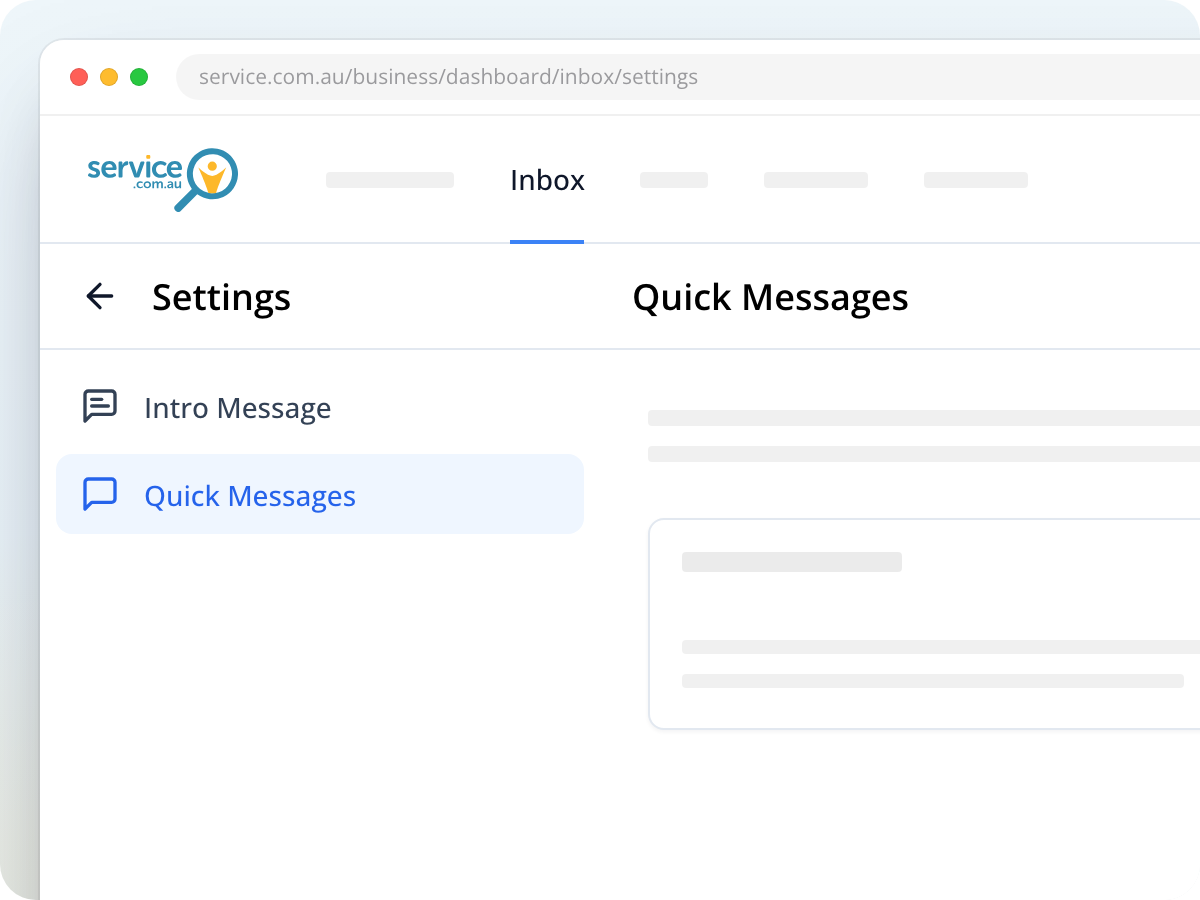
Set up your intro message
Your intro message is filled in for you each time you open Respond to request on a lead, so you don't have to write the same introduction every time. You can still change it before you send.
Open Intro Message
In Inbox settings, select Intro Message.
Write your message
Enter the introduction you'd like each homeowner to read first.
Add personalisation
Click on Insert Personalisation and choose a detail, such as Customer First Name, to have it filled in for each lead.
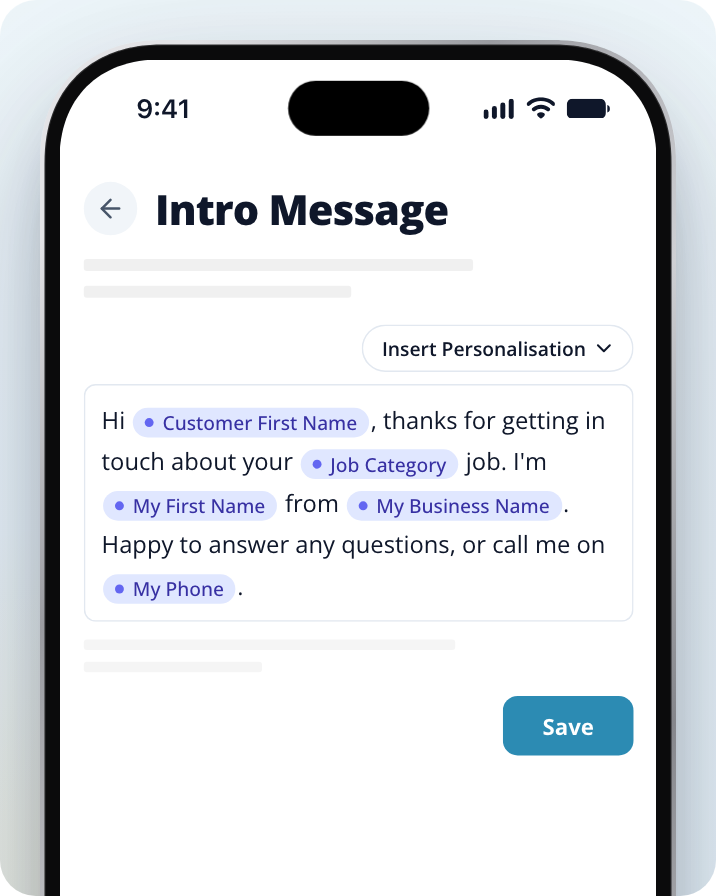
Save it
Click on Save. You'll see "Intro message saved".
To stop using an intro message, clear the box and click on Save. The message box will then start empty.
Editing your intro message in Toolbox
Your intro message is the same message in both places, so a change in one shows in the other. In Toolbox settings, open Quote, change the Intro message box and click on Save quote settings. The same page holds Quote validity and Quote terms, which are only set there.
An example intro message
"Hi {Customer First Name}, thanks for getting in touch about your {Job Category} job. I'm {My First Name} from {My Business Name}. Happy to answer any questions, or call me on {My Phone}."
Keep it short and true for every lead. Put details that change from job to job, like price or timing, in the message itself when you respond.
Set up quick messages
Quick messages are replies you write once and reuse, like answers to questions homeowners often ask.
Open Quick Messages
In Inbox settings, select Quick Messages.
Add a new quick message
Click on Add. If you haven't saved any yet, click on Create Quick Message.
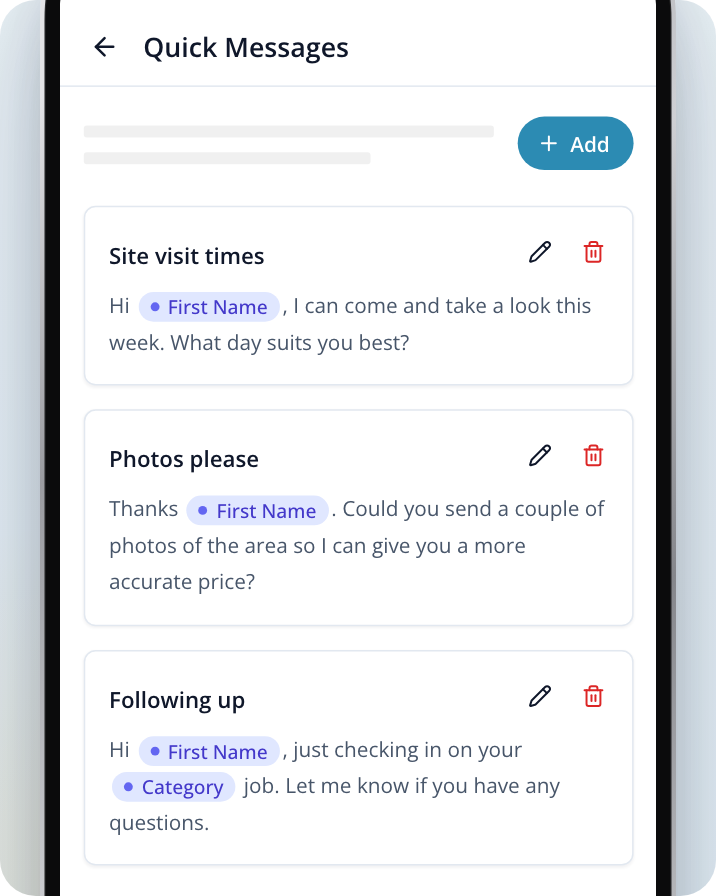
Give it a title
Enter a Title you'll recognise in a list, such as "Site visit times".
Write the message
Enter your Message, and use Insert Personalisation to add details such as the homeowner's first name.
Save it
Click on Save.
Editing or deleting a quick message
Each saved quick message has two buttons in its top right corner, with no words on them.
- Click on the pencil to change it. Edit Quick Message opens with the title and message filled in. Make your changes and click on Save.
- Click on the red bin to delete it. Select Delete to confirm.
Using a quick message
When you respond to a lead, click on Quick message in Respond to request and pick one from the list. You can also add one while you're messaging a homeowner. The list has an Edit link that takes you straight back to Quick Messages.
Picking a quick message in Respond to request replaces everything in the Message box, including your intro message. The form reminds you: "Choosing a quick message will replace the current draft." If you want both, pick the quick message first and then add your own introduction.
Example quick messages
- Site visit times: "Hi
{Customer First Name}, I can come and take a look this week. What day suits you best?" - Photos please: "Thanks
{Customer First Name}. Could you send a couple of photos of the area so I can give you a more accurate price?" - Following up: "Hi
{Customer First Name}, just checking in on your{Job Category}job. Let me know if you have any questions."
What Insert Personalisation fills in
Insert Personalisation adds a placeholder that's swapped for the real detail when the message is filled in. For your intro message, that happens as soon as the Respond to request form opens, so you can read it before you send.
- My First Name, My Last Name, My Phone and My Email: your own details from your account.
- My Business Name: your listing's name.
- Customer First Name and Customer Last Name: the homeowner's name.
- Job Category: the category of the lead, for example "Plumbing".
If a detail is missing (for example, the homeowner hasn't given a last name), that spot is left blank, so read your message before you click on Send response.