With Toolbox you can add any job to Jobs, not just Service.com.au leads, and each job shows you the next step to take, from the first visit through to being paid.
Add a job
Open Jobs
Go to Jobs. In the app it's a tab at the bottom of the screen.
Tap the + button
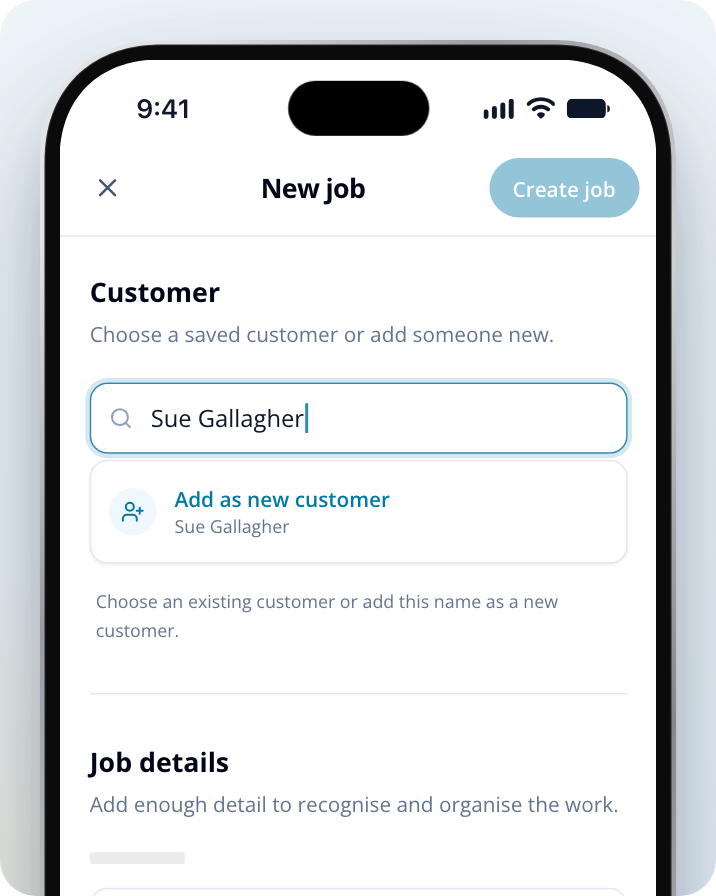
Tap the blue + button at the top of the Jobs list. The New job screen opens. Without Toolbox, the + shows you Toolbox instead.
Add the homeowner
Under Customer, start typing a name. Choose a saved customer, or add the name as a new customer with their phone and email (both optional).
Enter the service address
For a new customer, start typing the address and select it from the list. It's also saved as that customer's address.
Add the job details
Under Job details, enter a Job title (for example "Hot water system replacement"). In Lead source, choose a suggestion such as Referral or Repeat customer, or type your own. You can add a Description too.
Add photos
Under Photos, tap Add job photos and choose one or more images.
Create the job
Once you've added the customer and a job title, tap Create job at the top. The job starts at New.
Follow the next step on each job
Every job page shows one next step at a time, with a button that takes you straight to it. As the job moves along, the step changes:
- New: Book an inspection, or add an estimate instead. After an inspection, the step becomes Add estimate.
- Estimated: Follow up on the estimate. If the homeowner gives you the go-ahead, tap I've been hired.
- Quoted: Follow up on the quote. If the homeowner accepts, tap I've been hired.
- Hired: Book in the work, with a Schedule job button.
- Scheduled: Start the job. Tap Start job when work begins and the job moves to In progress.
- In progress: Complete the work. Tap Mark complete when the agreed work is finished.
- Work completed: Finish up the job. Create an invoice, or close the job when everything is settled.
- Invoiced: Waiting on payment shows what's still outstanding. Once the invoice is paid, the step changes to Invoice paid. Close out the job. Tap Mark done to close it.
Sending an invoice doesn't finish the job. If you invoice before the work is complete, the job asks you to Complete job first.
Book a visit with a start time and arrival window
Open the booking form
On the job, tap Book an inspection (for a new job) or Schedule job (for a hired job).
Choose the kind of visit
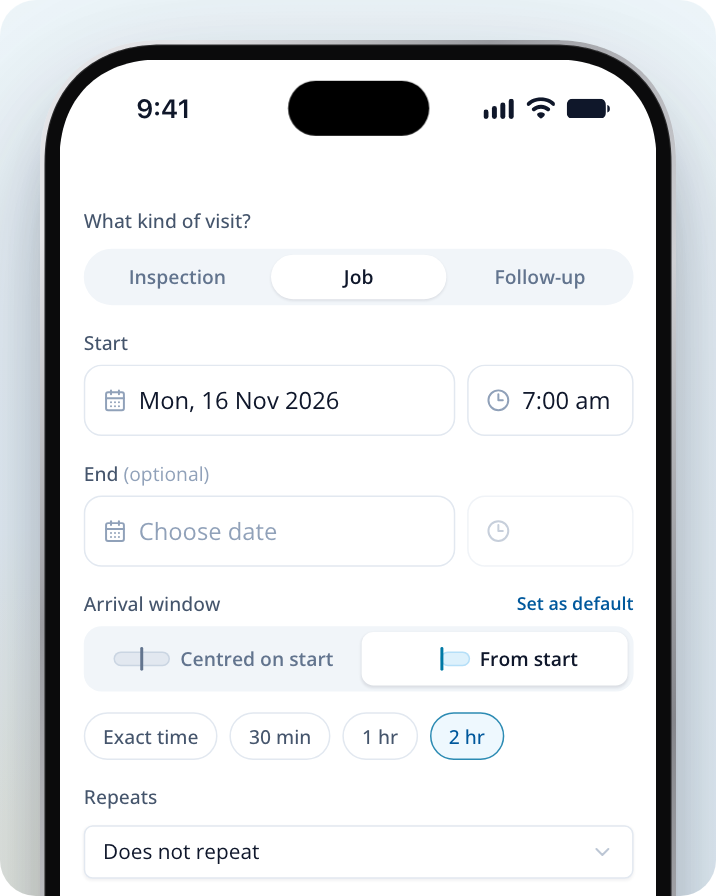
Under What kind of visit?, select Inspection, Job or Follow-up.
Set the start
Choose the Start date and time. Adding an End is optional.
Set the arrival window
Under Arrival window, choose Centred on start (the window runs before and after the start time) or From start (the window begins at the start time), then pick a window length. Tap Set as default to use it for future visits. If the window already matches your default, you'll see Default with a tick instead.
Book it
Tap Book job (or Schedule visit for an inspection). Booking the work moves the job to Scheduled. On a Service.com.au lead the button for an inspection reads Book visit, and you can also tap Propose time to send the homeowner a time to confirm.
What you see on the Jobs list
Jobs opens on Active, which groups your open jobs into Planning, Scheduled, In progress and Awaiting payment. Tap To do to see what needs you now:
- Today: jobs with a visit today, with the start time.
- Needs action: jobs waiting on you, each with its next step (for example Send estimate, Schedule job or Complete job).
- Waiting: estimates, quotes and invoices you've sent and are waiting on. Tap it to expand the list.
All shows every job.
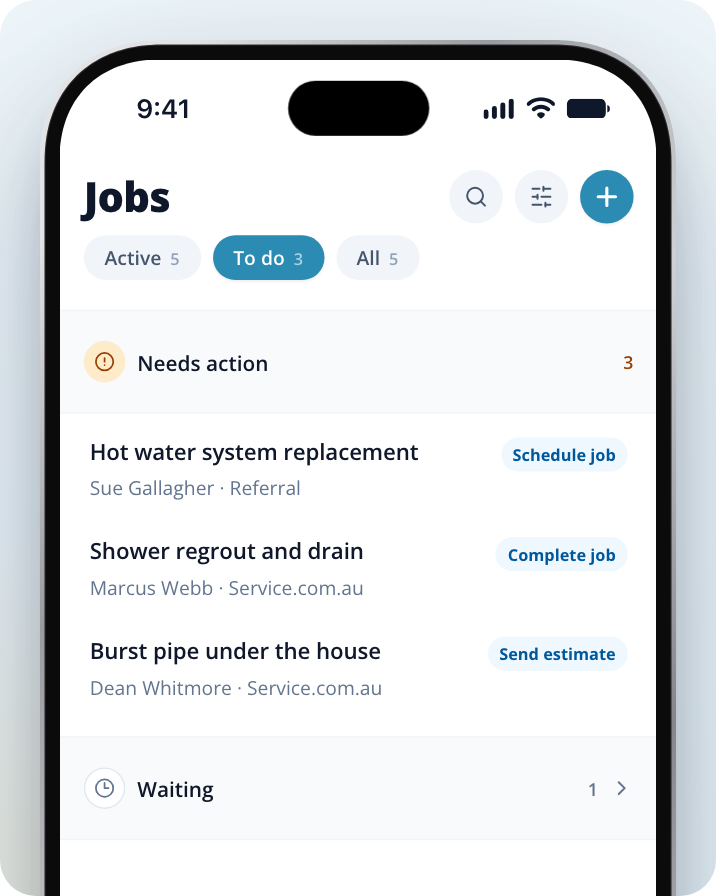
Each job in the list shows the homeowner's name and where the job came from. That's the Lead source you entered, Service.com.au for a Service.com.au lead, or Added by you if you didn't enter a source.
Mark a job hired or completed yourself
You don't have to wait for a next step. The buttons at the bottom of every job page let you move it along yourself.
Mark it hired
Tap I've been hired. Enter the Agreed price (or tick I don't want to share the price) and the Expected completion date, then tap Mark as hired. For a job you added yourself, nobody else is notified. For a Service.com.au lead, we let the homeowner know.
Mark it completed
Tap Complete job. Enter the Final price and the Actual completion date, then tap Complete job.
Close it as done
Tap Close job as done, then Mark as done. Any future visits must be completed or cancelled first. You can reopen the job later.
If you've already billed the homeowner another way, a completed job also shows Already invoiced elsewhere. For more on these steps, see How to Mark a Job as Hired or Completed.